
 After 10 days away I have returned with approx 2000 images to process. First job is to import them all, and then the time consuming job of editing out the keepers from the blurry duplicates.
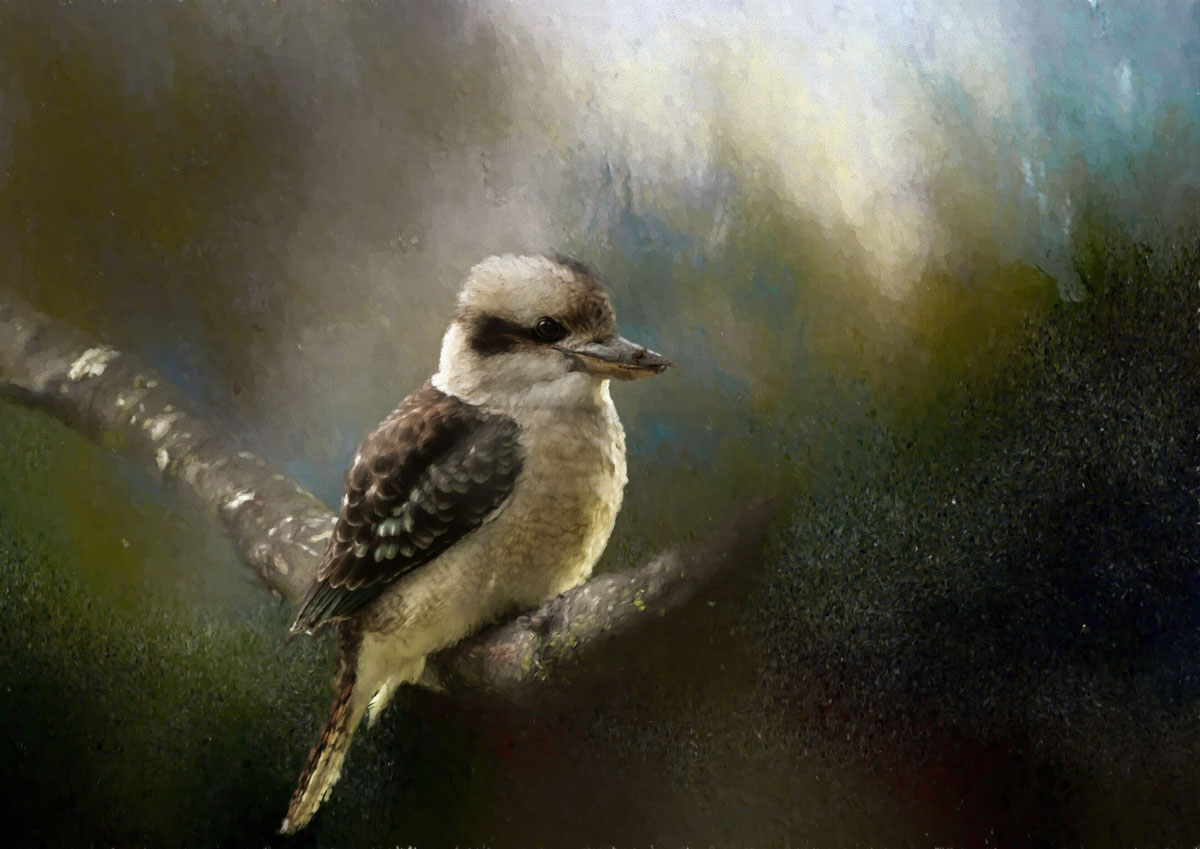
This image is one that could be considered not up to snuff, but with some careful editing it went from being a dark dull shot that was not 100% sharp, to some artistic magic instead 🙂 – Click on the image above to see a larger size
 Here is the original image, after quite a lot of editing in Lighroom. As you can see, the background is very bright and distracting, the heavy dark branch overpowers the image and takes focus away from the kookaburra.
Post Processing Steps:
- Edit original image in Lightroom with the focus on the kookaburra
- Bring into PS and run through Nik Color Efex to enhance the colours in the bird some more
- Select and mask out the bird on the branch with Topaz Remask
- Spend time tidying up the mask
- Trial several different Daily Texture Backgrounds until the right one is decided on and oriented correctly
- Tidy up the mask some more
- Flatten bird on background and bring into Topaz Impression
- Find the right effect, apply
- Tidy up some details
The lighting is at an awkward angle from behind and above the bird, so I had to make sure the tonal ranges with the background suited.
Overall I am pleased with how the final image came out. The end of the branch is a bit soft and could probably be tidied up a bit but its a vast improvement over the original photo
Its nice to be able to shoot an image, knowing that you can later edit it, and take an average photo and make it into something much better.
Do you like the painted version? Not your cup of tea? Let me know!


Nice images
Thanks
Beautiful edit of a cute little bird. I use the same tactics on many of my photos. Textures (jai’s are the best!) and Impressions can turn a so-so photo into art. I don’t use remask or make a selection however. I simply use place embedded in PS which puts texture on separate layer. Then add a mask to take texture off my subject or other parts of the photo. Guess there are always different ways to do things especially in PS.
Remask makes it easier and faster to get the initial mask. I like to have a clean selection so I can tidy up the edges nicely esp with feathers. Great thing about PS is you can use it whatever way suits you best 🙂
I think the painted backgrounds always make the bird images look better and can add some wonderful abstract lighting to the image. Lovely image!
Thanks, I spent ages trying to find one that had the dark and the light areas where I wanted them to be. This one had that plus good colour tones for the image as well.
It’s my cup of tea! 🙂 I do a lot of my photos that way and fall in love with each of them!
Glad to hear it!
Love it ,a work of art.
lovely effect Rose. Cute Kookaburra too
They are lots bigger than the NZ kingfishers!
I never saw any on our NZ trip. Are they as noisy lol?
They are pretty shy creatures, hard to shoot. I have never heard one but I think they are a lot quieter.
Typical so many Aussies are so loud lol
I like the edit a lot. I might have kept the branch though, since you removed a lot of the other elements? not sure, maybe I wouldn’t have.