
Hamilton Island Sunrise – AFTER
My first entry for the weekly AB Friday Challenge – woohoo! This is the AFTER image above.
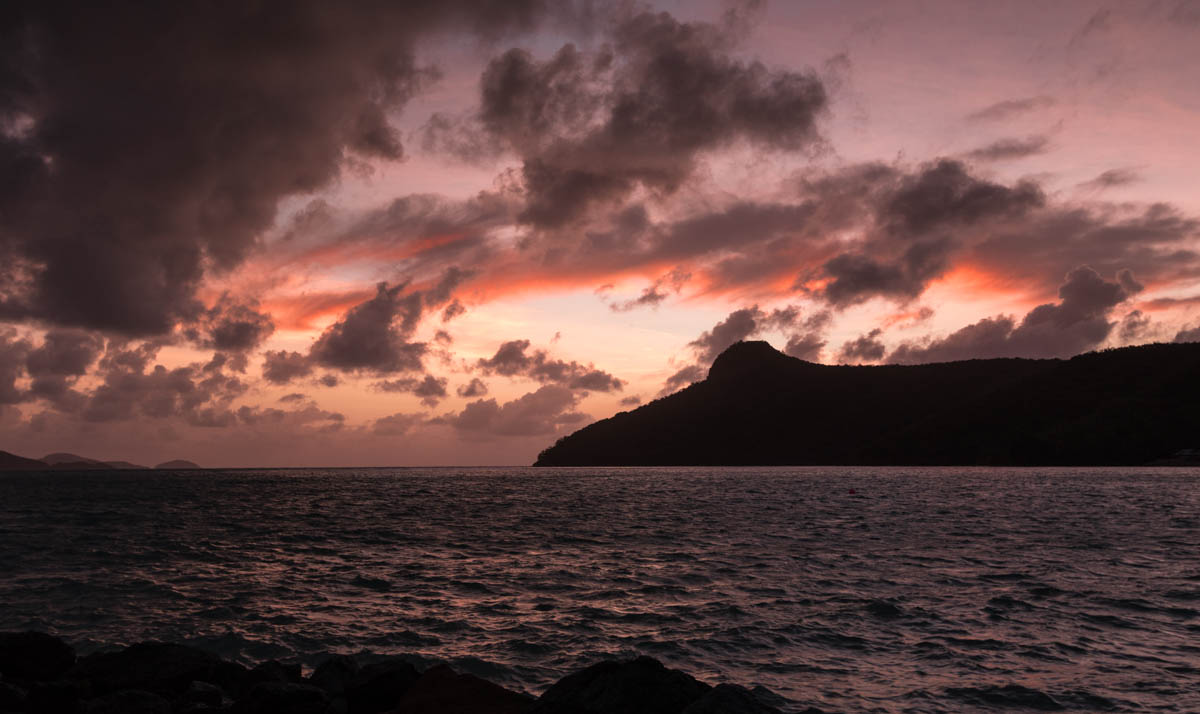
This image is of Passage Peak on Hamilton Island in Australia where I went recently for a conference. Because we were 3 hours behind NZ it turned out sunrise was at a civilised time for my morning hating body and I got up to see a couple of sunrises with my camera.
This was the last morning and it was very windy so there was a lot of cloud in the sky.
Post Processing steps:
1. Import RAW file into LR5 and set lens corrections, straighten horizon and crop image.
2. Adjust WB, contrast, highlights, shadows and whites, adding a touch of clarity and vibrance globally
3. Bring in a ND grad filter on the sky, bring exposure and highlights down, contrast and shadows up, add more clarity and saturation.
4. Darken the orange hue to pick up the colour in the clouds
5. Add a touch of pink/purple split toning to pick up the pink tones in the clouds better
That was it, all done in LR5 🙂
Here is the BEFORE unprocessed RAW file.
![]()
All comments and feedback welcome! Isn’t it exciting what you can do when processing a RAW file?


I do like them both. I love how you deepened the orange in the middle of the sky in the After photo. The Before photograph looks very stormy and brooding; I just love a good storm!
Thanks Lois, it was the morning after a storm went by, but still lots of clouds around due to the wind. I love a good cloudy sky in the right light 🙂
Pingback: After-Before Friday Week 38 | Visual Venturing
I love what you did with the sky, popping out those colors.
Thanks Mary, its at bit more intense in my version than in reality but Im sure Mother Nature won’t mind too much 🙂
Welcome to ABFriday! And a very nice submission. I like the warmer tones of the final image.
Hi Robin and thanks, the colours were a reflection on what I saw in the morning with a little bit of oomph added 🙂
Beautiful processing, I love the pink tones in the image creating a lovely feeling.
Thanks Ben, the final split toning added the pink and purple blend which I thought worked really well. Only my second time using split toning but it seems to work well for sunsets and sunrises 🙂
Yeah it does, a great technique to add colour to them ir enhnace the colour that is already there.
The sun is starting to get up later now so it will be more civilised for you. My best sunrise photos were taken in the winter at the park at about 8 AM. I do love your editing on this. It certainly makes it more dramatic.
Yes winter is far better timing but then its COLD and DARK and my bed is cosy and warm and its still hard to get up. I need more discipline!
Great!
Thanks!
OK, let’s all cheer “I LOVE IT RAW!!!” OK, sorry, that didn’t come out right. But I was shooting for almost three years straight before learning about RAW. Now I don’t bother with jpeg files at all except when exporting from Lightroom. I like what you did with this image. You were able to retain some blue in the sky which helps it to look very real.
Wow I can’t believe you didnt embrace RAW sooner, as it has so much capability. Took me about 6 months until I got my hands on a copy of LR2 (back in the day) and soon after LR3 came out and was a vast improvement and I was away 🙂
Yeah, well I’ve always been a bit slow!
It took me about 6 months probably and wasnt really til I got software that was properly capable that it made a lot of difference to me. But sadly it was only really last year that I actually PROPERLY learned how to use it and even then I only know some stuff 🙂
That’s exactly what I went through, too. Never had the ability to view or work on RAW files and had no idea why they were supposedly better until just recently.
Stunning image, I wish I was there. Your editing choices warmed the image significantly, it looks more like a sunset. Exceptional work.
Thanks Lore, it was a beautiful tropical island and a real treat to get to visit. Funny I never saw any sunsets, they happen really quick and I was on the wrong side of the island to get a good view.
I really like the after image. The colors are wonderful!
Thanks Kirsten, yes sunrises and sunsets can be amazing on the right day 🙂
Gorgeous, Stacey! And glad we got the after/before straightened out 😉 Love the split toning effect – I really do need to use that. As you pointed out (and Ben concurred), it’s a wonderful tool to use to boost sunrises and sunsets. Glad you were able to capture this so you could share it with the rest of us. And welcome to the “regular” ABFriday. So glad to have you!!
I have only used split toning twice and both on either a sunset or sunrise just to boost the colours a smidge, in the right place it works well.. Glad to be part of the regular crew, tho not sure I will always particpate. Reminds me I need to get the One Focus image to you today!
You have a few more days, Stacey, s no worries 🙂
Beautiful edit, it is great to see how you achieved it.
Cheers Karen, it was a learning experience for sure!